 Pin It
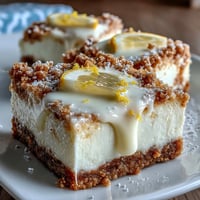
 The kitchen smelled like melted butter and summer berries, even though snow was piling up outside. I was testing a new way to use the freeze-dried strawberries I'd impulse-bought at the market, convinced they'd add something magical to my usual fudge routine. When I pulled those vibrant pink squares from the fridge and cut into them, the layers held firm, the color was almost unnaturally cheerful, and the taste was exactly what I'd hoped for: creamy, fruity, and just sweet enough to feel like a celebration. My neighbor wandered in, tried one, and asked if I was opening a candy shop.
I brought a batch to a potluck once, stacked in a clear container lined with wax paper. People kept asking what bakery I'd ordered from, and I loved watching their faces when I admitted I'd made them in about twenty minutes of active work. One friend, who claimed she never liked white chocolate, came back for seconds and admitted the strawberry powder changed everything. It became my go-to whenever I needed something that looked fancy but didn't require turning on the oven or spending hours in the kitchen.
Ingredients
- Digestive biscuits or graham crackers (200 g, finely crushed): The base needs to be sturdy enough to hold the creamy fudge, and these biscuits give you that perfect balance of crunch and slight sweetness without overpowering the strawberry layer.
- Unsalted butter (100 g, melted): This binds the crumbs together and adds richness, make sure its fully melted so every crumb gets coated evenly and the crust holds its shape when you press it down.
- White chocolate chips or chopped white chocolate (200 g): The foundation of the fudge layer, choose a good quality brand because it melts smoother and tastes creamier, avoid anything with a waxy finish.
- Sweetened condensed milk (395 g, 1 can): This is what turns melted chocolate into fudge, giving it that dense, smooth texture that slices cleanly and holds up in the fridge.
- Freeze-dried strawberries (50 g, ground to powder): The secret to intense berry flavor without added moisture, I pulse mine in a spice grinder until theyre fine as dust, and the color they give is stunning.
- Pure vanilla extract (1 tsp): A small amount rounds out the sweetness and keeps the white chocolate from tasting flat or one-dimensional.
- Pinch of salt: Just a tiny bit brightens the strawberry and balances the condensed milk, dont skip it even though it seems insignificant.
- Pink or red gel food coloring (1 to 2 drops, optional): If you want that Instagram-worthy pink, a drop or two deepens the hue without changing the taste, but the freeze-dried powder alone gives a lovely natural tint.
- Fresh strawberry slices (optional garnish): A pretty finishing touch that hints at whats inside and adds a fresh contrast to the rich fudge.
- Extra freeze-dried strawberry pieces or coarse sugar crystals (optional garnish): These add a little sparkle and texture on top, plus they reinforce the strawberry theme in a subtle, elegant way.
Tired of Takeout? 🥡
Get 10 meals you can make faster than delivery arrives. Seriously.
One email. No spam. Unsubscribe anytime.
Instructions
- Prep the pan:
- Line your 20 cm square baking pan with parchment paper, leaving a little overhang on two opposite sides so you can lift the whole slab out later without wrestling it. This one step makes cutting and serving so much easier.
- Make the crust:
- Toss the crushed biscuits and melted butter in a bowl and stir until every crumb is damp and the mixture clumps when you squeeze it. Press it firmly and evenly into the bottom of your pan, using the back of a spoon or a flat glass to compact it, then pop it in the fridge for 10 minutes to firm up.
- Melt the chocolate base:
- Set a heatproof bowl over a saucepan of gently simmering water, making sure the bottom of the bowl doesnt touch the water. Add the white chocolate chips and condensed milk, stirring slowly and steadily until everything melts into a smooth, glossy mixture.
- Flavor the fudge:
- Take the bowl off the heat and stir in the strawberry powder, vanilla, salt, and food coloring if youre using it. Mix thoroughly until the color is even and the powder is fully dissolved with no clumps.
- Assemble and chill:
- Pour the pink fudge mixture over your chilled crust and spread it out with a spatula, making sure it reaches every corner and the surface is level. Cover loosely with plastic wrap and refrigerate for at least 2 to 3 hours, or until the fudge feels firm when you press it gently.
- Slice and garnish:
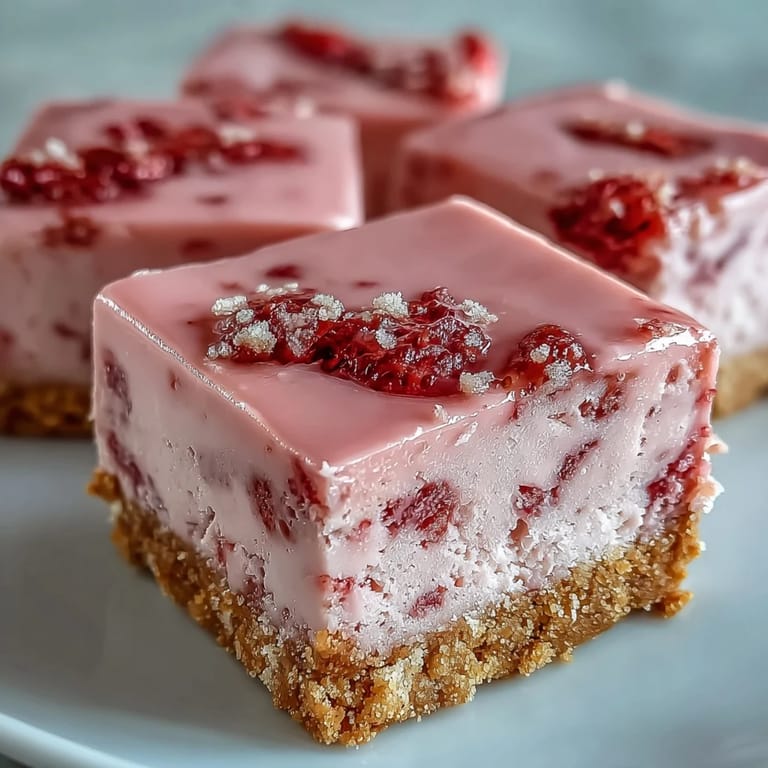
- Lift the whole block out using the parchment overhang, set it on a cutting board, and use a sharp knife to cut it into 16 squares, wiping the blade between cuts for clean edges. Top each square with a fresh strawberry slice or a sprinkle of freeze-dried pieces, then serve chilled or let them sit at room temperature for 10 minutes for a softer bite.
 Pin It
 One evening, I made these for a friends birthday and tucked them into a little tin with tissue paper. She texted me later that night saying she'd hidden the tin from her kids and was eating them one by one after they went to bed. That's when I realized this recipe wasn't just about the taste, it was about giving someone a small, sweet secret they could savor on their own terms.
Storing and Making Ahead
These squares keep beautifully in an airtight container in the fridge for up to five days, stacked between layers of parchment so they don't stick together. I've also frozen them for up to a month, thawing them in the fridge overnight before serving, and they come out just as creamy and vibrant. If you're making them for a party, you can prep the whole thing a day or two in advance and just slice and garnish right before guests arrive. The crust stays crunchy, the fudge stays firm, and the color stays bright, which makes them one of the most reliable make-ahead desserts in my rotation.
Flavor Variations
Once you've made the classic version, it's easy to play around with different freeze-dried fruits like raspberries, blueberries, or even mango for a tropical twist. I've swirled in a spoonful of crushed fresh raspberries for a marbled effect that looks stunning when you slice into it. You can also add a handful of chopped white chocolate chunks or mini marshmallows to the fudge layer for extra texture. For a more grown-up version, a tiny splash of rosewater or a pinch of cardamom gives the strawberry a sophisticated, floral edge that surprises people in the best way.
Serving Suggestions
These squares are rich, so a little goes a long way, and they pair beautifully with a cup of black coffee or a glass of cold milk. I like to serve them on a simple white platter with a few fresh berries scattered around for color and contrast. They're perfect for picnics, bake sales, or afternoon tea, and they travel well without melting or falling apart.
- Let them sit at room temperature for about 10 minutes before serving if you want a softer, fudgier texture.
- Dust the tops lightly with powdered sugar or edible glitter for an extra festive touch.
- Cut them into smaller pieces and serve them as petit fours at a dessert table.
 Pin It
 Every time I make these, I'm reminded that the best recipes are the ones that look impressive but feel easy, that taste indulgent but don't demand hours of your day. These strawberry fudge squares do exactly that, and they've earned a permanent spot in my dessert lineup.
Recipe FAQs
- → Can I use fresh strawberries instead of freeze-dried?
Yes, purée 100g fresh strawberries and strain to remove seeds. The texture may be slightly softer and chilling time may increase by an hour. Freeze-dried powder provides more concentrated flavor without added moisture.
- → How long do these keep in the refrigerator?
Store in an airtight container for up to 5 days. The squares remain firm and fudgy throughout. For longer storage, wrap individually and freeze for up to 2 months.
- → Can I make these dairy-free?
Substitute dairy-free white chocolate and coconut condensed milk. Use coconut oil or vegan butter for the crust. The texture remains deliciously creamy with these alternatives.
- → Why is my fudge layer not setting firm?
Ensure the chocolate is fully melted and incorporated into the condensed milk. If using fresh strawberry purée, it adds moisture which requires longer chilling time. For best results, use freeze-dried strawberry powder.
- → Can I use other types of crackers for the crust?
Digestive biscuits, graham crackers, or vanilla wafers work beautifully. For a gluten-free version, use crushed gluten-free vanilla cookies or almond flour mixed with a bit of sugar.
- → Do I need a double boiler to melt the chocolate?
A double boiler prevents scorching, but you can microwave in 30-second intervals, stirring between each. Just be gentle—white chocolate seizes easily if overheated.